Pregnancy/Maternity and Photography – Gerry’s Tips and tricks and the stuff to remember for the next session

People photography, not a strong point for me, nonetheless one must persevere and try new things and get out of the comfort zone, this is one such example and pleasantly enough it is relatively enjoyable and certainly a great way to learn new techniques, plus with all these baby factories about there is no shortage of models 😉

This is more a summary of what I have learnt and experienced, I am by no means experienced at this and I have mainly typed this out to serve me in the future to avoid making the same mistakes and remembering the key elements for things that work. In short YMMV. But hopefully someone else may learn from it, particulary from my errors.

So, in summary and before I forget, a couple of main points that I have found are key elements in regards to photography pregnant women and their partners (note, some of these are obviously cross-overs into many genres):

Note, I refer to the yet to be born baby as bubs, belly, bulge and all other manner of things…mostly nice things 😉

1) Eye Contact – In order of effectiveness a) bubs to mum and/or dad b) mum to dad with bubs to be as a second element. c) direct eye contact with viewer with bubs as second element.

2) Lighting – keep it simple – single source, softboxed. Also a second source to blow out a wall would be nice and a reflector just to take a bit more edge off the primary softbox source, mental note: purchase reflector.

3) Location –  probably one of the most important bits, scope it out before hand if possible, or at the very least have a backup plan when that the room or wall falls thru.

4) Poses – well, this is where the photos become good, excellent, money shots or downright fugly. Hand placement, leg placement and where the mum looks and how she looks are critical, watch those double chins and maintain a connection between bubs, mum and dad or between mum and dad.

5) Facial Expressions – remember mums to be are not usually models, they will not typically know about pose techniques or facial expressions or counting in (for example). Keeps things simple, small gentle smiles and laughter works well.

6) Wardrobe – different people will have different outfits and will have varying levels of comfort for semi nude stuff. Plan for both. Recommend colours. Remember black tops on the belly make it hard to define that bulge, white tops with a shawl covering the breats or just a simple boob-tube work well. Remember the attention is on the belly, make it prominent and ensure it does not get lost in the scene.

7) PP, black and white is where its at, why it looks better I dunno, maybe its a cultured thing (I have seen heaps of maternity shots and the majority are BW) however that said colour can and does work well too, choose the dominant colours carefully though, try and not detract from the main subjects. use solid prominent colours to define the bulge? or work with pascal colours?

1) Eye Contact and Connection

Its all about the belly and the bubs, this is directly linked to eye contact and connection. Whilst direct eye contact with the viewer may work in some cases I have found to these to be more manufactured and artifically posed images. The direct eye contact with the viewer gives the impression that the image and reason for the photograph is about the mum and dad and the bubs takes a second place. Now this is not to say never have any direct eye contact, rather choose these shots carefully and ensure there is a link to the bubs, this can be as simple as hands on the belly or the belly being prominent enough (bare, fabric covered etc.. more on that later) to add that extra element to teh frame. However always remember that with the direct eye contact shots the mum and dad’s eye will be the primary anchor point and hence they will be the primary subject, therefore utilise the bubs as a key second element or balancing element to the image.

Eye to bubs contact, this is the money shot in my opinion, or more correctly, its a easier shot to attain since you can have other elements that are a bit messed up and this eye to bubs contact can hold it together. At the the end of the day parents, in most cases, want images that portray this particular point (pregnancy that is) in their life, this connection they have with the child inside them, they want images that remind them of their physical change during this time and the connection they develop and nuture during the time, to couple with a sense of emotion and feeling between the parents can generate stunning images.

Parent to Parent eye contact, I think this almost falls into the same category as direct eye contact, however again, if you couple this as the primary focus/subject and use the bubs to be as the key second element and/or balancing element it can certainly work. I did have some ideas on trying to get the mum and dad to be head to head and create a silhouetted heart shape with the bodies and big belly, however its more of a unbalanced heart shape (due to the belly) and you gotta have peeps the same height! That also said the parent to parent eye contact does work well for some frames but in my opinion the parents to bubs eye contact works better.

2) Lighting

Keep it simple, rocking up with two umbrellas 3 strobes and a multitude of light modifiers is probably gonna make anyone nervous. I think you will get quite few comments about even a single off camera light source. Off camera flash is always an improvement to the standard onboard flashgun, this remains applicable for pregnancy shots i reckon. Remember the basics of single source lights and reflectors (if used), look for the butterfly shadows on the women and don’t strees about the blokes too much, keep them in the shadows if necessary, I think its is primarily about the mum and she should be the #1 element when all three parties are in the frame. Light up high and at 45 degrees seems to work quite nice, remember to adjust the distance to subject to modify the light fall off. Reflector on the oppositeside if used.

Backdrops, sometimes out of control depending on the location, I guess avoid messy background, this is pretty typical of most people shoots, however that said vine covered wall worked OK for me. Contrasting backgrounds is key for making that bulge stand out, blowing out the BG is a good idea however watch that the white top (if used) does not get lost in the scene, here a black small boob-tube would work well in my opinion. Black or White BGs will work I think, obviously to completely control these you would need your own backdrop, a wall with teh subject placed far enough away also works OK, but be prepared for some PP cleanup.

Outside lighting – a topic to be investigated

3) Locations

Windows work well, just remember to blow the window out, use only natural light if need be, door frames are also another winner, again blow the BG out, silhouette and go BW.

Most places are going to be homes or public areas keep this in mind when thinking about what location to use. Is there a large bare wall? is there enough space to get some separation between the subjects and the wall?

Always have a backup plan and also try and have at least three different backgrounds, all the same shots on the same BG can be a bit tedious.

A couple of things to try,

  • Window and Door
  • On the floor
  • Couch/Lounge (make sure its not too soft that they get lost in it!)
  • In the Nursery

4) Poses

Quick before I forget this one – remember to do both sides of the face, look for the better side, everyone has one 🙂

First thing first – remember the basics of what makes a good pose, particularly for a woman, make sure thighs, and leg areas are minimised, this is easily achieved by avoiding front on poses and using  the one foot forward resting on the toe tip technique. Note the front on pose can work, but remember to make sure those legs are crossed to minimise the apparent area.

Something else to remember and this is very much mum dependent, is their size and far off the drop is – I can only imagine the body change, the additional weight, tummy activity and chaos that harbouring a child can feel like, however it is not rocket science to know that the body changes and the mums body function changes and does become limited, moreso physically – it is not always comfortable and standing on one leg is not as easy as it is when not pregnant, hence being mindful of this and and how the poses are going to affect the mum is pretty important. In a nutshell it ain’t rocket science, use your common sense and be observant on how the mum feels and look and of course always ask if she is comfortable.

The next key points are SHOULDERS BACK and CHIN UP, simple as that, imagine if you hauling two bags of oranges around ya neck the postures gonna suffer, gently remind to keep those shoulders back and chin up and eyes down (for those belly connection poses). The chin up can help define the face and more importantly minimise any double chin action.

Hands and arms – the placement of these are critical, the placement of the mums and dads arms can really seal the connection between the parties, couple this with the eye contact and the image becomes all about the bubs.

As with any posing, remember the old saying, ‘one arm up one arm down’, this remains applicable in most cases for pregnancy/maternity stuff with a slight variation to accommodate that rather large thing inside the tum!

One hand placed below the belly and one placed on top, try different combinations, however I think the arm on top of the belly should be the arm that is closest to the camera/viewer, this maximises the view to the belly. This is classic arm placement for maternity and works best for the mum, bring the dad in and get a single hand on the belly or try both hands with dad standing behind, be careful not to portray them looking/facing out of the frame, angling them 45  degrees to the camera or so that they appear to ‘wrap around’  works well i reckon. The placement of the dads arms is also critical, if both arms are placed under the belly, do the same for the partner, try different combinations of dads hands on the outside and vice versa, this can change the dynamic of the image from the father providing a protective feel (arms on the outside) to a more secondary role, both can work well I think and is dependent on the parents and their relationship.

The classic side on pose works well with the hand ontop of the belly (and one underneath) and also the alternative one, hands on the back pushing the belly out, this is the proud mum pose and really shows off the belly – look for the ‘S’ shape and also work with the placement of the hands to hide any unslightly lower back bulge or on the flip side to show off the figure. Moving the hands up and down can change how the pose looks, work with different eye contact as well, however the mum to belly eye contact probably works best.

Moving from the side profile into the 3/4 position is a good change in poses and can often really engage the viewer more due to the more direct angle of the body to the viewer, take for example the side on profile where the body is ‘looking’ out of the frame and compare that to the 3/4 pose where the body moreso ‘looks’ towards the camera. Remember to get that forward leg on the tippy toe and point towards the camera or at 45 degrees.

Mum in front with dad cradling from  behind or slightly to the side is classic stuff and can be a really powerful image, some things to consider are the height of the two parents, and where to get those eyes to look. I found getting the faces in close is a must, the stronger images were the ones where the dad had his face directly on mums shoulder and they both looked towards the bubs.

Mum sitting cross legged on the floor – this is one pose I have not really tried and does not particulary ring my bell – this comes more from the fact I find sitting cross leged pretty uncomfortable on a good day, let alone what it would be like with 2 bags of oranges hanging off ya sternum! That said, i can see the benfits of the straight on shot (sitting down crossed legged) where you could really put prominence on the reverse belly button or similiar.

On the couch, this one is quite a bit harder than it looks in my opinion, couches are those things where its easy to slide into and be really comfortable, often getting lost in there, as one can imagine this is not necessarily desirable for a maternity pose. However given that it can be a comfortable position and relatively easy for the mum to move around, being off her feet and all, its worth trying. The key aspect, in my opinion, is the get the face out and defined, don’t lose it in the cushions and don’t let them (cushions couch) compete too much. Getting one arm up behind the head propping it up seems to work, this coupled with the other hand (far one) on the belly can be nice.

On the floor – yep as one can guess it ain’t comfortable, use a small pillow to prop the head. I only have one style of shot that I like on the floor and its more of a glamour style pose than a pregnancy pose, its more about the mum and gets the eye contact straight to the viewer, this works well with diagonal compositions and using the face to lead the viewer to the belly, however the bubs will always be second fiddle in these shots. I find that the strike rate is pretty low for this pose and you have to be careful with the angle of the face, it can really look uncomfortable with only the slightest of changes in position. Also getting the facial expression is tricky and also minimising the forehead wrinkles is quite important.

Peek -a-boo – this is alot of fun and really simple pose, simply use a doorway in a hall and get the mum to poke her belly out, I found this works well with half the face, legs and some chest in there, just the belly looks a bit impersonal, having some more in the view and having the mum look at bubs to be seems to be sweet spot.

Pose-age summary – basically as previously mentioned you really need to lock in that closeness and connection between the mum, bubs to be and dad, without this single factor I think you are working uphill to get a good frame – obviously where bubs is not the primary point then its an exception. Closeness is also key when all 3 parties are invloved, if dad has a bit of distance between him and the mum or bubs, this can just scream out ‘distance’ and look crapola, blokes typically need a bit of proding to get them in closer, i am certainly the same! I don’t think I have any images or seen any where I thought ‘thats too close’ hence get them in close. Take lots of shots with small adjustments in the poses, a small change can often make the difference between a ok shot and one where you go ‘wow’. This can also cover you for various facial expressions…segway…

5) Facial Expressions

We have all had shots taken of us where the eyes go one way the mouth the other way or something similiar and it all looks like a bad viral email image for the freak family! Sometimes i think taking a few extra shots with different expressions can really help nail that money shot. So the best way to do it, well i don’t think there is forumla for bring this out, however, engaging with the mum/dad and getting them to feel comfortable in front of you will definitely bring out those beautiful natural, genuine smiles. Those with a bit of charm will excel in this area I reckon, for those like me with people skills that have been honed for grunts, cuss words and typical engo talk will have to work a bit harder!

6) Wardrobe

Pretty important aspect, obvioulsy working within the limitations of the mums wardrobe is a must and more importantly what she is compfortable with. This is something that is going to be different for each session and dependent on whether the couple want to go topless, fully clothed, nude or somewhere in between. I don’t think I am a fan of fully nude maternity shots – semi nude ones where there is some skin seems to work well, having the bulging belly bare is a preferred option in my opinion, mainly since it makes it a bit easier to define the belly, when you work with a black top covering the belly you really need to think carefully about how to define that belly and not to lose it in the frame. This is particularly important for mums where their bulge is not that big….yet.

Irrespective of clothing amount, good solid colours are paramount, avoid patterns and lairy colours, these in most cases can compete or draw attention away form the mum and bubs to be. If images are going to be BW conversions then the actually solid colour becomes a little less important, however I think working with pascal colours is prefferred and makes for a easier composition for those colour shots – i also like pascals…

Simple boob-tubes work well, remember to get up nice and high on the back and keep them as small as possible, you can also use this with a single arm over the breasts and this can give that illusion of semi-nudity.

Single colour pants like jeans/slacks work well, I am not a fan of the tights in most cases, I like a loose leg pant, it can help balance out the form – this however is more a preference thing than anything else.

Fully clothed shots – either white or black tops work well with a shawl placed over the shoulders and breasts, this can really get some nice depth and definition to a covered belly. Try different props to help accentuate the belly and profile.

Semi-nude, this to me means topless bloke and a woman with pants and breasts covered – this seems to be quite popular and really works well in black and white. I don’t think you need buff people for this and it can work for the skinny guys, like myself!

7) Post Processing

Post processing is a subjective part of photography. Two things are worth mentioning about PP in my opinion, 1) what a photographer perceives in a image in terms of processing compared to the average punter is typically vastly different. 2) Work on developing your own style, it may grow from an existing style of another more proficient photographer but as long as you develop and cultivate your own style then in my opinion its all good.

There is no doubt that Black and White Photography is more utilised for maternity photography, I am not sure whether BW suits maternity any more than normal portraits which often can really sing in BW, but I reckon its got more of a social stigma about it, BW may convey that slightly more edgey feel, more reminscent of the older days when photography was more valued and required a higher skill set. The BW also breaks the image down a bit more, reduces it to sub-elements and removes some of those often distracting elements, loud colours which can detract from the main subject (s).

Blown out backgrounds work well to give that dreamy glowed look, this can also be achieved with high key processing to an extent.

Soft focus, warmer tones, glow all these are just tools that you can use for portrait stuff and its applicable to maternity stuff, really there is not set forumla (and there should not be) for getting the best images from a session, its more a thing which depends on the couple, the setting and the dynamics present. Use the PP tools available to compliment the subjects, frames and scene…..segway

Compliment the subjects…this is photography 101, PP should compliment the frame and subjects not overpower it or detract attention, it should accentuate the image and typically does not require alot of application, I personally find when applying an effect I dial it in to where I can notice it or where I think it starts to look good than back it off a bit.

Finally, as my motto goes – “no amount of processing will fix bad composition”, for maternity, this has the added the … “will fix bad lack of eye contact/connection and poor posing”

Echo Point and the Giant Stairway

Nope, its not some bloody fairytale, just a bushwalk in the Blue Mountains, its been a few years since I have done this walk, this time with someone more than 15 years younger than me (shite that makes me feel old) – that said it was he doing all the huffying and puffing and me, well did not even raise a sweat – insert smiley lo…

Its a pretty cruisy walk – the staircase is a bit hectic in the wet, however if you take your time you can get to the bottom with minimal knee shaking.

The walk around the valley wall is pretty nice and quite easy and leads you up into Katoomba Falls, which i was promptly told there was no way we were walking up there 🙂 damn softy, oh well the old railway it was then.

This walk also has some personally history for me – i took a photo at the base of the falls many years ago with my trusty olf Sony DSC-V1 (which got stolen) and a dinky little 5″ tripod, that one photo pretty well wetted my interested in this hobby – the rest is history I guess.

A few images from the day to compare how far I have come…hmmm, thats debatable whether I have improved much 🙂

A few stats from the walk

  • Average pace : 3.76 kph
  • Time: 2 hours
  • Total Distance 3.04 km (signage is pretty spot on)
  • Max Altitude: 990
  • Min Altitude: 725 (that would be that giant stairway huh..all 284 metres of it)
  • Max speed 6 kph..pumping..

Nikkor 135mm f2.8

Ha, premo lens for a dirt cheap price, just what I love. This should hopefully compliment the 105mm f2.5 that has become oh so regular in so many locations for me. Even after the short period of use I am very much liking this 135mm f2.8, its very sharp, comparable or equal to the 105mm f2.5 and the contrast is pretty sweet as well.

Interestingly this is the Ai series, the same as the 105mm f2.5. One thing i did learn today was the difference between the Ai and Ai-s, the Ai-s lens have a small slot in the bayonet for metering or something on one of the older film cameras. For the 135mm f2.8 lens the difference between the Ai and Ai-s is two things:

1) the little slot on the bayonet mount

2) The focus throw is 180 degrees rather than 180 degrees.

This copy of the lens is in very good nick, there is little if any brassing on the bayonet and it looks substantially less used than my tructy 105mm f2.5

Enough babbling, some pictures please.

yeah yeah yeah… i know its OOF

Cessna Birddog

The U.S. Army was searching for an aircraft that could adjust artillery fire, as well as perform liaison duties, and preferably be constructed of all metal, as the canvas covered Liaison aircraft used during World War II (primarily Stinson and Piper products) had a short service life. The US Army issued the specification for a two-seat liaison and observation monoplane and the Cessna Aircraft Company submitted the Cessna Model 305A, a development of the Cessna 170. The Cessna 305A was a single-engined, light-weight, strut-braced high-wing monoplane with a tailwheel landing gear. The greatest difference from the Cessna 170 was that the 305A only had two seats, in tandem configuration (the largest tandem-seat aircraft that Cessna ever produced), with angled side windows to improve ground observation. Other differences included a re-designed rear fuselage, providing a view directly to the rear (a feature later dubbed “Omni-View” and carried to Cessna single-engine aircraft after 1964), and transparent panels in the wings’ center-section (similar to those found on the Cessna 140 and the later Cessna 150 Aerobat model), which allowed the pilot to look directly overhead. A wider door was fitted to allow a stretcher to be loaded.

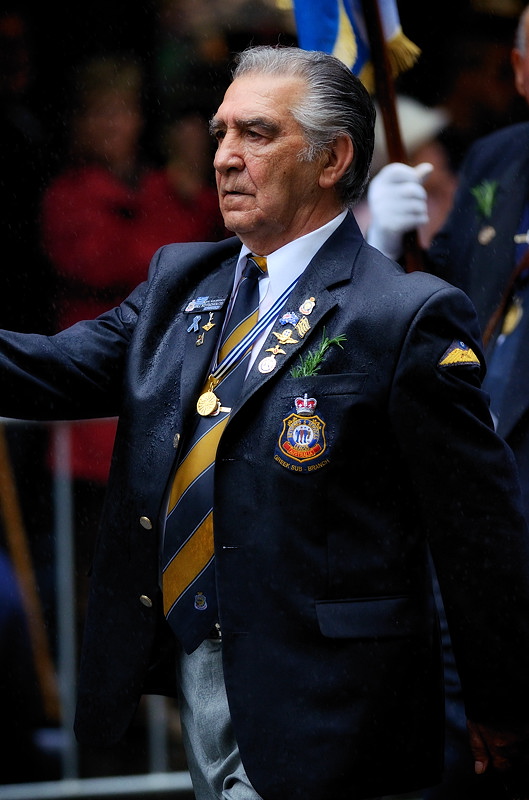
The Faces of Anzac Day 2011

Anzac Day is great day that never ceases to amaze me and fills me with a immense sense of respect for those left surviving from some of the crazy conflicts over the years.

For those in Sydney it was a cloudy and wet experience but the passion certainly was not damped out, it is always a great day and awesome when you can start to recongnise some of the old codgers every year. Its even better when new faces appear to carry on the memory of those who have passed on, whether it be from old age or through unfortunate circumstances in a conflict in another country.

As it has for a number of years, the rain came down repeatedly but was not too heavy to deter most supporters and marchers, there were certainly less photographers out this year compared with last (from my POV).

Anzac Spirit

A now non-existent piece of Graf over in Annadale

The Anzac spirit or Anzac legend is a concept which suggests that Australian and New Zealand soldiers possess shared characteristics, specifically the qualities those soldiers are believed to have shown on the battlefield in World War I. These qualities cluster around several ideas, including endurance, courage, ingenuity, good humour, larrikinism, and mateship. According to this concept, the soldiers are perceived to have been innocent and fit, stoical and laconic, irreverent in the face of authority, naturally egalitarian and disdainful of British class differences.

Progressive Sharpening Example

Remember there are different techniques for different situations

Here’s an example I often use, this is for progressive sharpening for web presentation – essentially program independent (however i use CNX2)

Step 1; resample image at a small size/resolution, typically 50% of the original.

Step 2: Sharpen using unsharp mask with the following values:
Radius 3
Intensity 15%

Step 3: Fit photo, basically to the final size 800×800 for typical web presentation.

Step 4: Sharpen using unsharp mask with the following values:
Radius 3
Intensity 25%

This basically takes care of the fine grain sharpening, now you can also add in another unsharp mask using a larger radius if the image is slightly (and only slightly) OOF, I find typically radius of 75-80 at no more than 7-10% can salvage well.

(note: the following image is pretty darn sharp anyway, however this is an example of progressive sharpening for the web)

below are the two images, the first is a nef file that was made to fit 775×800 then saved as jpeg at 84% quality, the second is the same nef with the steps outline above applied.

no sharp

progressive sharp

and a zoomed in version of the two to compare

and just for reference, crop from the nef file, no sharpening, either in camera or PP (other than what happens when converting to jpeg)

Cockatoo Island and Lost Tools of Henry Hoke Exhibition

A great Exhibition!

The story of Australian genius thwarted. Where would we be with the conveniences of modern life such as the Waterproof Tap, the Population Tool or Dehydrated Pills – haven’t you ever wondered where they came from? These unique and intriguing inventions, along many others, were created by the now forgotten Henry Hoke, the innovative genius behind these strokes of genius. What became apparent, after exhaustive research by the Institute of Backyard Studies, was that Henry Hoke was a man whose intellect ranged far and wide over the broadest field of human endeavour imaginable and even, at times, beyond. His working experiences apparently included a remarkable stint in the Cockatoo Island Dockyards. Set against the backdrop of remnant island machinery, this satirical exhibition will amuse and delight.

Bell 212

The Bell 212 Twin Huey (also known as the Twin Two-Twelve) is a two-bladed, twin-engined, medium helicopter that first flew in 1968. Originally manufactured by Bell Helicopter in Fort Worth, Texas, production was moved to Mirabel, Quebec, Canada in 1988, along with all Bell commercial helicopter production after that plant opened in 1986.[1][2]

The 212 is marketed to civilian operators and has a fifteen-seat configuration, with one pilot and fourteen passengers. In cargo configuration the 212 has an internal capacity of 220 ft³ (6.23 m³). An external load of up to 5,000 lb (2,268 kg) can be carried.

Gerry’s Nikon D7000 Review

This is essentially my experience and thoughts about getting a new camera body (D7000), remember, it may not apply to you or your situation, it is written from my perspective for my photography level and for my upgrade path (from the Nikon D80)

So, its been pretty darn close to 4 years since I purchased my first DSLR unit, the Nikon D80, a cutting edge piece of technology back in early 2007 (from memory it was released mid 2006), this camera was an upgrade from my Sony DSC-V3 camera which, back then was the last of the ‘Prosumer’ compact cameras, I did love that camera and it did produce many a fine image for me.

I have been looking at the bodies as they got released over recent years wondering which direction I should take and what would be best suited to me, my photography level. Early on the the Nikon D90 and D300s were both worthy contenters for my attention, however at their release time there was no real justifiable reason for upgrading when my D80 was doing a perfectly fine job of capturing images. Interestingly enough, I think I have produced some of my best images to date with the D80 in the last year or so which has had me questioning the need for a upgrade. However there are a few niggling issues/aspects about the D80 that started to make me think more about upgrading the body recently, this coupled with great prices was making it hard to resist 🙂 Essentially it came down to three key points, price, low light capability and manual lens support.

Price;

The D7000 up to January this year was pushing AUD1600 for an australian body from a brick and mortar store, the grey market options were not that much better and without a very tidy saving and the loss of the aussie warranty they were not looking good, even B&H who had it for USD1100 (which did not have stock for yonks) was not really an option unless I got someone to pick one up on their travels. Digitalrev did have them at AUD1600 when they were first released, however I am somewhat jaded with them and frankly would not buy from them with a real compelling reason.

Quite recently the aussie brick and mortar stores really brough the prices down on some Nikon items, in particular the D7000 and the D700,for example ryda.com.au had the D7000 body only for AUD1279 with a free bad and cleaning kit (better than a kick in the rear I say) and the D700 for AUD 2290. This pretty well galvanised my decision especially since I could very well drop down to my local ryda store (Parramatta road) and pick one up at my convience, no waiting, no postage cost, no photocopied manual and charging adapter. In a word…nioce.

Low light capability;

More frequently I found myself cursing the the inability of the D80 to push past iso 800 with decent results, even in situations where I just needed to push the shutter up just a bit to get me over the line I found it struggled, this coupled with the fact I do tend to and like to slightly under expose my images. The D7000 was at the fore front in this department when compared to D90, D300s and D700 (well maybe).

Manual Lens Support;

I love my manual lens, I have a 105mm f2.5 which I really love, a great piece of nikkor engineering, a lens that produces contrast second to none in my lens line up, the only one that gets very close is the AFS 300mm f4. I also have a 105mm micro f4 which does not see much use now and also a 100-300mm f5.6 which is kinda obsolete now I have the 300mm f4, however they both get pulled out every now and then, the 100-300 has really nailed me some magical images in my eyes albeit with a pretty low strike rate. The D7000 promised manual lens support, most importantly, metering! (apply a suitable hallelujah sound here), man, imagine it, no more chimping my ass off with my 105mm! this could only do wonders for my strike rate. It also had the focusing assist for manual mode, the little green dot and Left and Right arrows to assist in obtaining the focus. An interesting side note, I notice the D80 has only the green dot to indicate focus has been achieved (on a manual lens also), man, never realised this…doh, insert forehead slap here.

So, here I am, a week and half into the ownership of a Nikon D7000 camera. I have clocked up 1080 images, used it for going to the park and chasing chaos around, some low light helichopper work, portraits of chaos and big nan, avalon airshow and a cockatoo island session. I have read only a smattering of the excessively thick manual (that said the index is pretty good) but thought I would share my personal review from the perspective of a D80 abuser to that of a D7000 user. There are plenty of better and complete reviews out there like Dpreview so I will not repeat the 15 pages of tech spec comparisons, as mentioned its just my user experiecne from the D80 to the D7000 and some of the pros and cons that I found important.

Gerrys Pros Summary;

  1. Manual Lens support
  2. AF tune
  3. Low Light capability
  4. More megapixels (yeah yeah I hear ya already…pipe down and read the rest)
  5. Weather sealed body

Gerrys Cons Summary;

  1. Ergonomics
  2. Raw file size
  3. Over exposure
  4. No ‘one click’ zoom

Pros Details

1) Manual Lens Support

Well as already mentioned, the manual lens support is just divine, you can record up to 12 (i think from memory) manual focus lens which you can recall with a preset number, its just a matter of setting up the focal length and maximum aperture and your away. I have the function button on the front currently setup to cycle through the manual lens presets.

The manual lens now meters! unlike the D80 which gave you no clue whatsoever, the D7000 provides feedback in the HUD (thats my acronym for the viewerfinder display) with regard to the f-stop your at and the usual metering bars +/- – i mean wow, I am still coming to grips with this!

The manual lens also has the manual assist indicators, this is on the left hand side of the HUD and consists of a single green dot and a arrow on either side, basically the arrows give you feedback to which direction you need to rotate the focus ring to achieve the correct focus. This seems pretty darn accurate and I have only had it struggle a bit at f2.5 on the 105 and this could be well be user error where i had the focus point on the wrong part of the subject. I am now in the habit of using this focus assist and also glancing at the subject before pressing the shutter and it is working pretty nicely, strike rate is already looking better.

2) AF Tune;

This is a very very handy feature, I recently realised that my Nikkor 28mm f2.8 was a bit out of focus (probably had something to do with my oily aperture blade clean, lol) I spent a few minutes one evening playing with this lens and the AF tune feature and found that with a AF tune setting of -16 resulted in my 28mm f2.8 being dangerously sharp again. I mean how cool is that, that is such sensible and useful function.

3) Low Light Capability;

Well there are plenty of examples of this across the net, but all I can say is the high iso is light years ahead of what my poor D80 is. There are plenty of situations where using a disturbingly large iso 2000+ is warranted and now if the image is nicely exposed, the image (with the in camera NR) becomes quite usuable – A secondary effect (more important for me) of the good high iso capability is the ability at lower ISOs to recover details from shadows with a significantly reduced amount of noise appearing, as mentioned I typically slightly under expose rather than over expose so this is one nice aspect for my style.

Heres one example on the right, from the other week after leaving the pool, ISO 1600 with lots of shadow, some post processing to recover some shadows and there is minimal noise, no NR on this one. This kind of mid range range ISO clean-ness really suits my photography and fits in well to my work flow.

Another example is the Sikorsky S-64 image on the left, a handheld pano shot using three images at ISO 1000, it has had quite some work to recover the shadows but the noise was definitely minimal, this was also with an exposure to suit the sunset rather than the subject. With the D80 there would have been no hope unless I had a tripod and the ability to freeze time, in this case there was no time to setup a tripod after zipping out onto the airfield and would have missed it anyway!

4) More Megapixels;

I can hear the groans already, well sometimes a megapixel increase is not such a bad thing, I did not choose this body for the increase in the pixel count, however after visiting the airshow and being a bit short on the focal length it meant I had some usuable cropped images which would have never been possible with the D80. Obviously this is a two edged sword, this means bigger file sizes, more storage required and more grunt required in the PP computer, however its probably something I can deal with, especially if it means I can crop images like on the right. The original uncropped version is below.

Weather Sealed Body;

Well so they say, I think this is really more of a gimmick and can lead you into a false sense of security, there are plenty examples of nikon ‘weather sealed’ bodies corroding away from the inside, I think the key is a bit like watches that say ‘water resistant’ and those that say ‘water proof’, ‘weather sealed’ really means ‘water resistant’. Nonetheless I will put this on the list of pros for me, especially since I do a fair amount of outside stuff…

So onto the Cons;

1) Ergonomics;

In a nutshell this camera is not as good as my D80. A couple of aspects make it so, firstly the shape of the grip, it is definitely more square and not as contoured as the D80’s grip, this is detrimental to the comfortability( for me). Secondly, there is less ‘land’ on the back of the camera due to the increased sreen and hence the shuffling across of the RHS controls, this means less land for the thumb and thumb portion of the palm (I am sure there is technical term for that bit of ya hand!) this makes the camera feel less secure in my hands, particularly as I tend to walk around with the camera in my right hand. Thirdly, the finger wrap around part of the grip is shallower then the D80 meaning you essentially have less to grasp onto. This was probably the biggest disappointment about the D7000 for me and having rather large hands meant this was of  a real concern. However, for me I wanted a camera that was relatively small, something comparable to the D80, something that I could happily stick in the pack and go hiking or carry for a day without needing a physio session, so this was the compromise. At the end of the day I will get used to it and it is certainly not a show stopper.

(insert some comparsion images of the D80 and D7000)

2) Raw file Size:

I nearly fell off my chair when the camera told me I had only 144 shots odd on my old 4gb card, holy crap, at nearly 20 mb for each raw this was gonna be disk consuming excerise! Admittingly this was with full raw files at 14-bit on a 16.2 megapixel sensor. So why’s this a con you say? Well it is at the moment, possibly it may change down the track, however at this point it is chewing up disk space like a little 19 month old toddler that I know eats, or should I say, inhales dinner.

The second disadvantage to the raw file size is processing time. This combined with Capture NX2 inability to not crash when sitting there doing sweet ‘f’ all is making my post processing a real drag. Working with NEF’s from the D7000 will guarantee a crash about every 5 minutes, usually when saving the edited file, but sometimes in the midst of just do a few simple edits. Now to be fair its a new camera and the software has probably not quite caught up and I am only using a 32 bit, dual core processor with 4gb RAM, but man, the performance is abysmal and is causing me to do some serious cursing.

3) Over exposure (on bright scenes);

This was the second con after the ergonomics, and this could well be user error here and would love for someone to point out what I am doing wrong ’cause I been doing it for a while on te D80 :). However there is also evidence out there in the web of people experiencing the same issue (not really a issue more of characteristic!). Its not a design flaw or a reason not to buy the camera imo (and you will see plenty of peeps on dpreview banging on that they wont buy it because of this?!), I think its more of the way the camera is setup to correctly expose common scenes, ie maybe to correctly expose faces at the expense of the overall scene?

Anyway the important point is, given the way the D80 and the D90 exposures it appears to be design direction by Nikon and well, I am used to the D80 and its metering system and quite frankly, at this point, the D7000 does a very similiar job! I typically use the manual mode and always have the exposure on the – side a fraction, if working in other semi-auto modes, I just dial in -0.5 on teh exposure compensation, just like I did on the D80.

4) One Click Zoom;

I think the D300s has this and the D700 does too I am pretty sure, basically its a one button press to get the preview image on teh LCD zoomed into the max, this is a really handy feature when using manual lens and you do alot of focus checking. With that said the D7000 zoom button is at least a crapload fastener than the D80. Not as good as a single press option but adequate I guess. Little things like this where they may leave off features to maintain the features of the higher models just shits me too by the way.

Gerry’s Conclusion;

Well, all in all, I think this is the perfect upgrade path for me, I have (in my mind) got my moneys worth out the D80 and it will also continue to serve as a second body, hopefully for many years. The 4 year period for the upgrade feels appropriate and I have obtained better glass in the years after getting the D80 rather than look at  a new body. Whilst there are few lens I am definitely wanting to get the D7000 has filled a number of key holes for me, low light capability and manual lens support are the two aspects  that I will undoubtly see an increased improvement in my photography, not necessarily in quality but more importantly an improved process in capturing them and better strike rate.

Sikorsky S-64 “Skycrane”

The Sikorksy S-64 was designed as an enlarged version of the prototype flying crane helicopter, the Sikorsky S-60. The S-64 had a six-blade main rotor and was powered by two 4,050 shaft horsepower (3,020 kW) Pratt & Whitney JFTD12A turboshaft engines. The prototype S-64 first flew on May 9, 1962 and was followed by two further examples for evaluation by the German armed forces. The Germans did not place an order, but the United States Army placed an initial order for six S-64A helicopters (with the designation YCH-54A Tarhe). Seven S-64E variants were built by Sikorsky for the civil market.