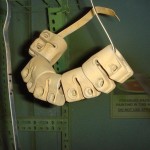
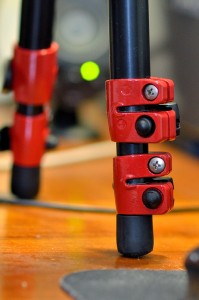
Well, the day has come where I finally decided I had better do something with my tripod which has had a pretty hard life in the last few years, particularly due to the harsh seascapes it has had to endure, often with only a brief fresh water rinse.
The legs steadily got stiffer and the levers became pretty inflexible, a quick adjustment on the nyloc nuts may have helped, however it would only be a short term fix. I do plan on getting a new tripod one day, however not much point doing that until the current does not serve me correctly or becomes unserviceable. 400 bucks for a new tripod is better spent elsewhere at the moment.
The tripod is a Manfrotto 190XPROB, not a bad old tripod for the coin and definitely one that has served me well and will continue to do so for many a year I reckon. The basic material used is Aluminum (note i refer to this as AL or al or ally) and plastic, the aluminum comes in a number of forms, the legs are tube, probably a 5000 series AL or maybe even 6000 series, the leg joint fittings are cast aluminum, the junction of the legs and the swivel clamp thingy-m-bob are also cast aluminum, the head attachment fitting is a cast/machined AL product and the there are a number of small steel items, the periphery items are typically plastic and the cap screws appear to be cadmium plated stainless.
So, the main issue with this tripod is the legs and particularly the leg join fittings, mainly the lower ones have develop quite an amount of corrosion, this is not rocket science, these things have been dipped in and out of salt water for quite some time and no matter how much cleaning with fresh water there is always going to be some small amount of that Na stuff that gets holed up in some little cranny, not usually too much of a problem when all the AL surfaces are sealed, however once a small break in the paintwork occurs and that contacts with the Na and its aluminum’s equivalent of terminal cancer. Also having dissimiliar metals (steel and AL) in contact is not a great idea when the paintwork starts to go – galvanic corrosion.
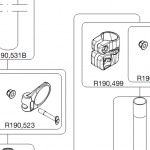
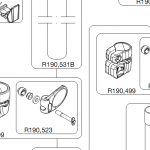
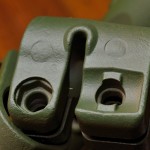
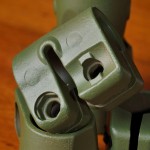
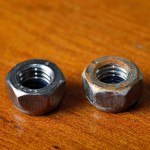
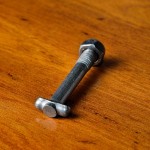
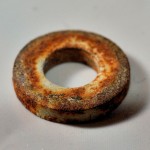 OK, so these leg join fittings (referred to as clamps), they are simply a cast aluminum clamp which the legs past thru, they are clamped up to the upper leg using a standard phillips screw (fully threaded) and a loose nut, this provides the attachment to the upper leg and is fixed. The lower part of the clamp is passed thru the next leg section down and is secured using a non standard tee bolt with the last 10mm threaded, this is coupled with a dodgy steel washer and stainless steel nyloc nut. So, I am impressed with the fact they used a stainless steel t-bolt and nut but dissapointed with the washer, it is some form of steel and is probably a galvanised type however given the advanced rust (see picture) on it compared to the nut and t-bolt (which have no rust) it has poor rust properties. The loose nuts and phillips screws appear to be cadmium plated stainless, this makes sense if its low grade stainless steel and they plated it to try and minimise the galvanic corrosion between the dissimliar metals and also to play an aesthetic role as well. These have held up pretty well but are covered with teh white cancer dust that is aluminum corrosion.
Note: The latest version of these tripos do not have this dodgy washer, they appear to have replaced it with a washer head nut, probably a better idea, parts minimisation and its probably stainless. Refer to spare parts manual
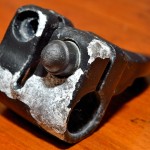
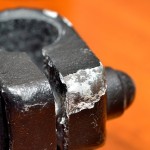
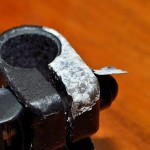
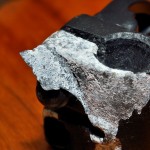
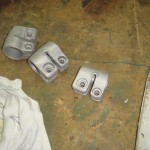
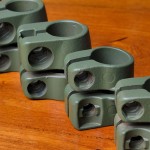
The clamp fittings/leg joins – the lower ones have the corners pretty banged up and this where the corrosion has really set in. These fittings, as mentioned are cast aluminum, not the greatest in terms corrosion resistant AL. These are powder coated by the factory, a cheap, quick and effective paint and one i especially dislike, however its quite tough and has good impact resistant, however this also means brittle and one classic downer with powder coating is that is you do get any form of corrosion it will just run under the paint and the next thing you know is all the paint just drops off. This basically what has happened with these fittings.
So, the plan of attack – now note, why do all this? why not just powder coat them or something similar? these fittings will get chipped and knocked, there is no doubt about that, however having good corrosion protection whereby the corrosion is less likely to ‘run’ under the paint should give me a good couple of years before having to do this again, plus this is standard practice for most aircraft, including float planes that dip in and out of salt water on a daily basis.
1) Remove all paint from from the fittings, half of it can be flaked off…could use stripper but easier to just go straight to sandblasting below.
2) Sandblast / bead blast – removes all corrosion and provide a good surface finish for corrosion protection treatment. This is a 15 minute job.
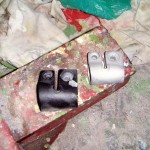
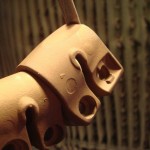
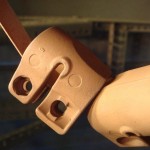
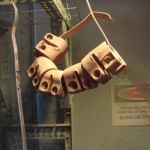
3) Alodine (1201) fittings (alodine is a chemical conversion for aluminum, common place on all aircraft). This when done directly after the sand blasting is quite effective and and is better than etching the material. This stuff can be bought locally and its around the 30 bucks per quart (ready made, referred to as 1201), you can also get the powder based stuff (referred to as 1200). I left them in over night and it took to the material really well much more than I wa sexpecting. This usually leaves the aluminum with a golden transparent coating, more of a dirty yellow in my case but this is due to the cast material, on normal 2000 series alcad or bare aluminium where it is more typically used it is a more golden colour.
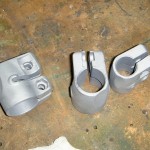
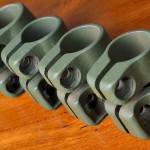
4) Epoxy primer – BMS10-11 another aircraft grade item, this stuff when applied to a alodined surface has great adhesion and they is not much out there which is better than this, its also pretty cost effective, 15 bucks a can, this stuff is typically a yellow/green colour. Compare this to epoxy primer you buy from bunnings and it is not really that expensive.
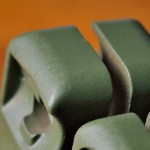
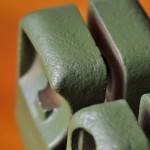
Now, note, check the two images below, the left is the upper fitting/clamp which had very little corrosion, the right is the lower fitting, you can see the result of the pitting and craters caused by the corrosion.
5) top coat as required, epoxy paints are better in my opinion, just gotta find a colour that suits 🙂
7) Replace all standard hardware with new stuff, bare minimum 316L stainless steel, typically referred to as marine grade stainless. This is particularly important for the dodgy washers which have copped a fair whack in the rust department.
Right, so what kinda hardware is it?
All metric stuff which makes sense since its made in italy.
The black cadmium plated pan head phillips head screws are M5, length 14mm perDIN 7985/ISO 7045
The loose hex nuts are 5mm per DIN934
The nyloc nuts are 5mm per DIN985
The washers are M5 unknown spec.
where can you get this stuff? boltsnutsscrewsonline of course 🙂 postage is a bit of a bitch – you can probably get the same stuff from your average marine shop.
I replaced the loose nuts with stainless steel dome nuts, looks better 🙂
8) Treat the inside of the tube legs with Cor-ban 35 (BMS3-35)
and the final finish…
