Plantings get new lease on life

Wow, plantings hasn’t been updated in ages!! To bring the blog for these guys up to speed, out of the three plantings, two survived and went into little pots to continue to grow into new bonsais. After a year of healthy growth, they both needed a bit of TLC, as they had lost some of their leaves in the recent hot weather and they were also planted in not very good soil….

They have started to re-gain their leaves, but I decided they needed a re-pot to further stimulate new growth…..So I emptied out the old soil and put in new bonsai soil. I have added moss to one and small pebbles that I had on hand for the other.
dsc_7482.jpg
These guys are going to be back bigger and better with lots of leaves, and hopefully some more branches so I can begin to shape them!

Goodbye Balls

I have been in serious denial about Ball’s health. Ever since I took him to class last year to be re-potted, its been downhill from there.

Though I faithfully watered him and hoped (almost prayed even) for new roots to take hold, it wasn’t to be and I finally plucked up the courage to pull Balls out of the pot to check for new roots.

It wasn’t too be and he had in fact probably not had some for some time. This was pretty devastating for me, since he was Lindsay’s bonsai that Poppy had given him when he died. Now that Linz has died too, I wanted Balls to survive to remember him by. But I needed to let Balls go and so this will be the last post for Balls.

My first bonsai casualty since Pop died. Goodbye Balls…..

Pear gets ready for summer

After many months of feeling the winter bulge, Pear felt the need for a bit of a spring work out before summer hits…..

Time for a re-pot, some reinvigorating new soil, re-wiring and a hair cut.

Enter new bonsai re-potting area with all the right tools and equipment, making it much easier and efficient to re-pot from home. Big call, given that I usually don’t like to do it without the watchful eye of Tina, but I need to harden up and develop confidence to do these things myself. Plus bonsai-ing is in my blood right?!

So I put a new wire in through the butterfly drain holes at the bottom to secure Pear into the pot and put some new bonsai soil in. Pear sits higher in the pot now so show off a big root that gives the illusion of age 🙂 I have put a little rock at the back to further secure Pear in the pot and to help Pear sit at the correct angle. Pear has a tough shape to work with, so I have tried to add wire and cut off a few branches to try and encourage Pear to grow in informal upright style.
dsc_7503.jpg
Give Pear a few years and it will be interesting to see if this shape takes hold…

Stretch is back!

dsc_7350.jpgAfter many months with no leaves, and many a discussion between myself and Nan about whether or not Stretch is indeed alive, I am pleased to report- THAT STRETCH IS BACK!

dsc_7351.jpgHe has lots of leaves and looks very healthy now. I took him to class on the 19th October to get a check-up with Tina (bonsai expert at Bonsai and Beyond). Apparently, Spring is not the time to re-pot Japanese Maples, so Stretch just got the once-over and had a guide wire inserted on the left hand side (if looking from the front aspect). This draws that branch down and keeps it there. We also added wire to give shape to the apex and the main branch on the right side. You can now see a clear triangle shape and I think his classification is now informal upright.

                               Stretch is well and truly back in business, and had a mini hair cut to prove it 🙂

Australia Telescope Compact Array

Recent trip to lovely Narrabri awesome place with a awesome funny set of antennae on tracks….don’t look to compact to me 🙂

“The Australia Telescope Compact Array (ATCA), at the Narrabri Observatory, is an array of six 22-m antennas used for radio astronomy. It is located about 25 km west of the town of Narrabri in rural NSW (about 500 km north-west of Sydney). It is operated by the Australia Telescope National Facility, a division of CSIRO”

Tripod Case – DIY

I did see this done some where, but cannot put my finger on it…maybe dslrusers.com.

Tired of risking the tripod in the baggage? yes, I have seen first hand the damage that can be done to baggage – unfortunatly you cannont rely on getting the tripod on as carryon luggage, hence the need for a sturdy scarifical case. Whilts this was rather expensive, prolly since I went to bunnings, you could do it a bit cheaper.

Cost of stuff….

1.5m long, 100mm diameter AS/NZS 1260 SL19 – ~ $13

Qty 2 Endcap adapters to suit 100mm diameter (Vinidex) AS1260 – ~ $4

Qty 2 Endcaps 100 mm diameter – ~ $5

Adhesive stuff, went the hardcore pressure stuff (green) cost the same but assumed it is stronger due to pressure rating – ~$4.50

Now, measured this up to suit my Manfrotto 190XPROB and 486RC2 head and what do you know…it don’t fit.. crapper, so after a few tweaks, ie a scallop out of the tube it just squeezes in there, anyone owuld have thought they manufactured the 100mm diameter dunny tubing just to make tripod cases…perfect fit there!

So..its pretty easy really, just chop to length, probably the key part cause if ya mess this up our buggered…then glue the ends on, in my case a bit of filing to make the scallop and done…just wait for the glue to dry.

So, pictures say a thousand words…

Mareeba Tropical Savanna and Wetland Reserve

The Mareeba Tropical Savanna and Wetland Reserve is located only an hour’s drive from Cairns or Port Douglas, yet offers the visitor tours and activities that are an authentic Australian experience in the heart of the outback.

Set within the savannas of North Queensland, it is a gateway to Cape York Peninsula and the Gulf Savannah, and provides an excellent base from which to visit the World Heritage listed Wet Tropics Rainforests and Great Barrier Reef, as well as the Cairns Highlands and Atherton Tablelands.

The Reserve, known locally as the Mareeba Wetlands, protects over 5000 acres of savannas and wetlands, providing a sanctuary for much of tropical Australia’s savanna and wetland flora and fauna, and cultural heritage.

Computer Upgrade….

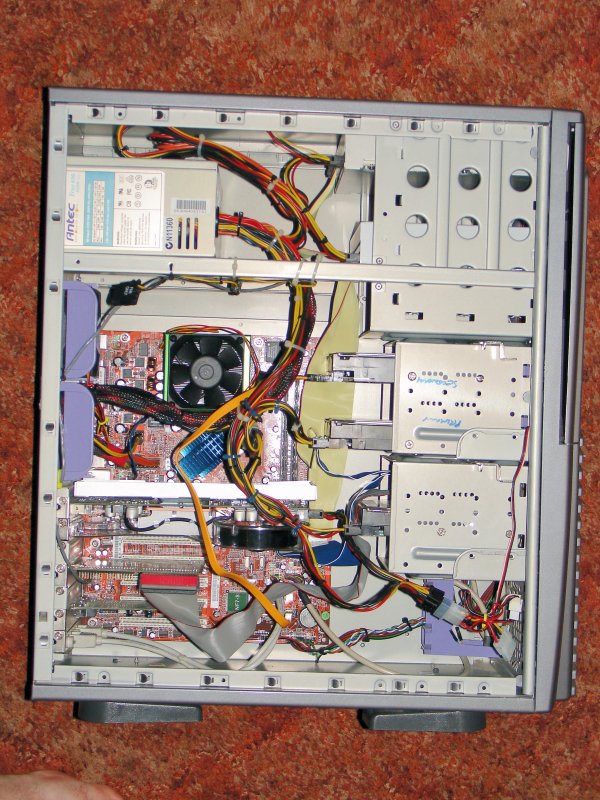
after many failing bits, dodgy RAM, corrupt data and general lack of anything decent in terms of FPS during so of the even least intensive games it was decided that it had to go…well not quite it will get farmed downstream for something else, but definietly without the dodge bits…

so let me start from the beginning..or close there of…

got donated a Abit NF7-S from a mate, hence decided need a new case and obviuosly at that point matching processor and RAM, if I remember correctly it was a AMD athlon 3000XP or thereabouts…

Nice setup in the case, multiple HDD’s buy cooling was a bitch and the northbridge fan screamed fromtime to time…something after this minor upgrade was the additon of a decent (at that time anyways..) videocard. NVIDIA 5700 ultra – was never particularly impressed by it, ran loud and heated up my case!

Next came the cooling upgrade, quite a whule after the video card came out, so a tracked down a dirt cheap cooler for the vid card from www.pccasegear.com.au, on special for $9 or something silly. Also picked up a stack of nice quiet nexus 80mm fans…..so what about that northbridge..yep fixed that screamer with a passive cooler..looks funky too.

so this setup ran nice and quiet and had reasonble performance….could run CSS on its defaulted selected values (no HDR etc) and get about 35fps in the benchmark…nothing to write home about…but hey its worked!

decent cooling and a fairly stable system resulted in some overclocking, mainly on the video card…

using rivatuner (excellent program by the way) I bumped the 5700 ultra up to a core speed of 580 and memclock speed of 1100. With these setting I was getting a nice 48-50fps in the CSS bench, cooling was no issue barely even noticed it.

typically 23-25 degrees during idle and up to 50 degrees during stress.

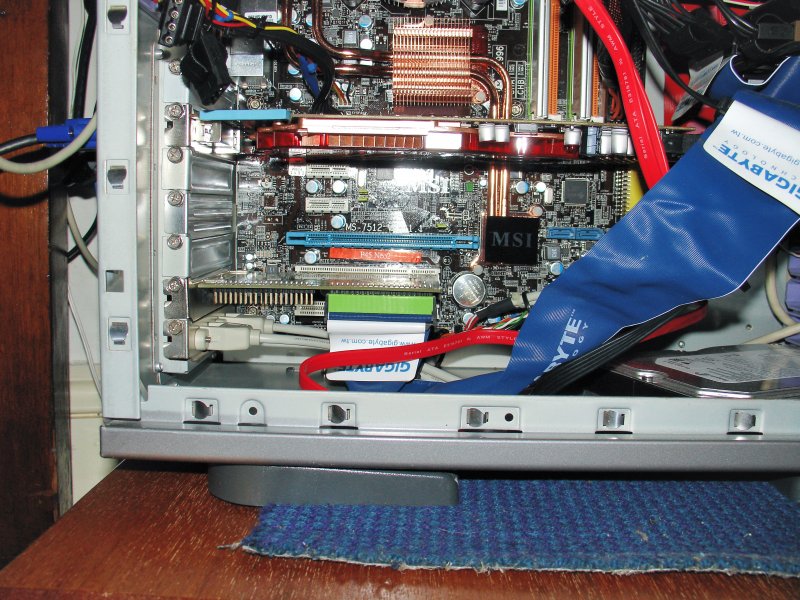
So finally the 2008 upgrade, here are the specs. Note made the switch from AMD to Intel for the Proc on this occasion.

Proc: Intel E8500 (runs dual 3.16Ghz)

RAM 4gb Geil (nothing really special just 5 stuff)

Mobo: MSI P45-NEO2

Video Card: Gigabyte ATI/AMD HD4850

Power Supply: Corsair HX620

new 500gb seagate 7200.11

existing 500gb seagate 7200.11

existing 320gb seagate 7200.9?

Strangler Figs

The Strangler Fig is a tall canopy, widely buttressed tree which grows to 45m in height. The top of this tree spreads like an umbrella. It features light coloured bark. In the rainforest the strangler fig germinates only in the branches of a host tree from the seed deposited by birds. Many roots are sent down and they gradually envelope and strangle the host tree leaving the fig in its place. There are five species of strangler fig represented in the Park.
Leaves:Leaves are simple, large, glossy green above and paler below. Commonly betwwen 4 and 7cm in length.
Flowers: The flowers are on the inside of the fruit and are pollinated by a wasp which enters the fruit through a small hole before the fleshy part of the fruit develops.
Fruit: Fruit is large (about 3cm with a nipple on the end) decorative and tasty which means that it is relished by birds. The fig is dark purple when ripe with yellowish dots, fleshy and ovular. They are a most important food tree for birds

Constant Speed Prop

DSC_5854.jpgInteresting units these… all the more so when ya get to pull them apart, and yes the grease was handy 🙂 This one is a recent MLG failure victim (Chieftian if I remember correctly), quite a nice Hartzell in its working days…dsc_5856.jpg

Propeller construction may consist of an aluminum “clam-shell” hub where the hub captures the blades, or a steel hub “spider” design where the blades are clamped to a hub . The blades may be made from an aluminum forging or from either Kevlar 49® or Carbon based fabrics or unidirectional tapes. The composite blades would additionally incorporate a leading edge erosion sheath to protect the blade from both abrasion (sand) and erosion (water) as well as offer an external conductive for a lightning strike.

The pitch control typically comes from a hydraulic fly-ball governor mounted on the engine. The governor senses whether the engine/propeller is running at the correct RPM and either supplies or maintains oil flow to the propeller, or drains oil to the engine sump. Of course, it is very important that the engine-mounted governor be properly matched to the propeller for proper pitch change command and response. The governor may or may not be supplied by the propeller manufacturer; however, it is necessary to ensure the propeller manufacturer has approved the governor for use with its propeller. In addition to controlling the propeller, this governor typically contains a pump that increases the oil pressure to a higher level than that which the engine supplies to a value sufficient to control the propeller.

Read More →