Sydney Opera House

Sydney Opera House
Trying out the Kase Night Filter, its an interesting filter, even used in this situation which is not entirely what it is designed for, it adjusts colour casts typically associated with city lights and light pollution.
One very positive thing about it is the fact there appears to be no effect on sharpness which is always a concern when stacking more glass out the front, in general all of the Kase stuff I have tried (and own) excels in maintaining sharpness.
#kasefilters #kase

Sydney Opera House – Kase Night Filter,

Sydney Sunset

… from Mrs Macquarie’s Chair

There is some really beautiful detail in this image, you can see the projections onto the Opera House sails (LHS), the Harbour bridge climbers, the lights of North sydney.
It can be quite tricky to capture sunset scenes when shooting directly into the sunset or light source, the large dynamic range in the light means you need ot bracket your images, even when the light does become more subtle and soft as when this shot was taken.

This image is a panorama of 3 frames, with each frame bracketed, you can see the result in this by looking at the shadow detail on the opera house and the full rich orange of the sunset underneath the bridge. There are quite a few ways to do images like this, in this case I have automatically blended the individual pano frames in Lightroom resulting in 3 DNG format files, these are then sent to Photoshop to be stitched together, there is then a bit of wrangling to ensure the perspective is correct and just some usual adjustments to accentuate the scene.

How to guarantee a wet and gloomy sunset?

well, just give me the free time to come along 😉 I see so many awesome sunsets through the pool glass windows while going for a swim, or as we wrangle.. i mean ..read stories.. to Tickles and Chaos or on the drive home and just about every time I plan to go out its dull.
On the brightside it was a pretty quiet evening on the harbour 🙂

D750 coupled with Nikkor 24-70 f2.8 @ 24mm Aperture: f10
Shutter Speed: 220.5s
ISO: 100
Out front: Lee Bigstopper

The view from Kirribilli

view large .. or go home 😉

I think I stood at this very spot almost to the day, 2 years ago! I was looking at a picture I took in mid 2012 from the exact same spot and its very interesting to see how much things have changed in the way I take a photo…not very much 😉
The city skyline on the hand, its really taking some change, over on the right at the Barangaroo site there are some serious skyline protrusions appearing 🙂

ya gotta view this one full size .. and zoom in, its not quite full res, but you can read the writing on the buildings 😉

6 landscape orientation images stitched together – the polariser really gives the sky a kick here, whilst its has created a slight dark area in the middle which had ot be adjusted in post, I think the overall deepening of the sky colour worked nicely.

Exif love:
D750 coupled with Nikkor 24-70mm f2.8 @ 70mm Aperture: f10 and Shutter Speed: 1/1.6s
ISO 100
Out front – Lee graduated filter (0.9x) and Hoya CPL

https://blog.avernus.com.au/the-view-from-kirribilli/

Watching, waiting

This young lady came prepared, she had two cameras and was pumping out some panorama images, probably be a darn sight better than mine 🙂

It was a chilly evening, however it certainly did not deter the tourists and photo enthusiasts down on the northern side of the harbour, i was cruising over the bridge on the regular sunday run with the girls and noted that the sky was looking potentially photo worthy 🙂

It is hard to get something different here, well i think so anyway, there are so many awesome shots of the city skyline which are hard to compete with – so after taking the usual panoramic shots I thought I would go for the vertical panorama style instead…not overly different, however the human element and the pretty wicked sky gave it a little extra kick in my books.

I hope ya'all had a great weekend

Exif love:
D750 coupled with Nikkor 24-70mm f2.8 @ 24mm Aperture: f9 and Shutter Speed: 1/1.3s
ISO 100
Out front – Lee graduated filter (0.9x) and Hoya CPL (this really helps draw out that deep colour in the sky.

+Landscape Photography

https://blog.avernus.com.au/watching-waiting/

Sydney Opera House

Are tired of vivid shots yet ? well you have another week of it until it all gets wrapped up but I am sure the images will still flow long after that 🙂

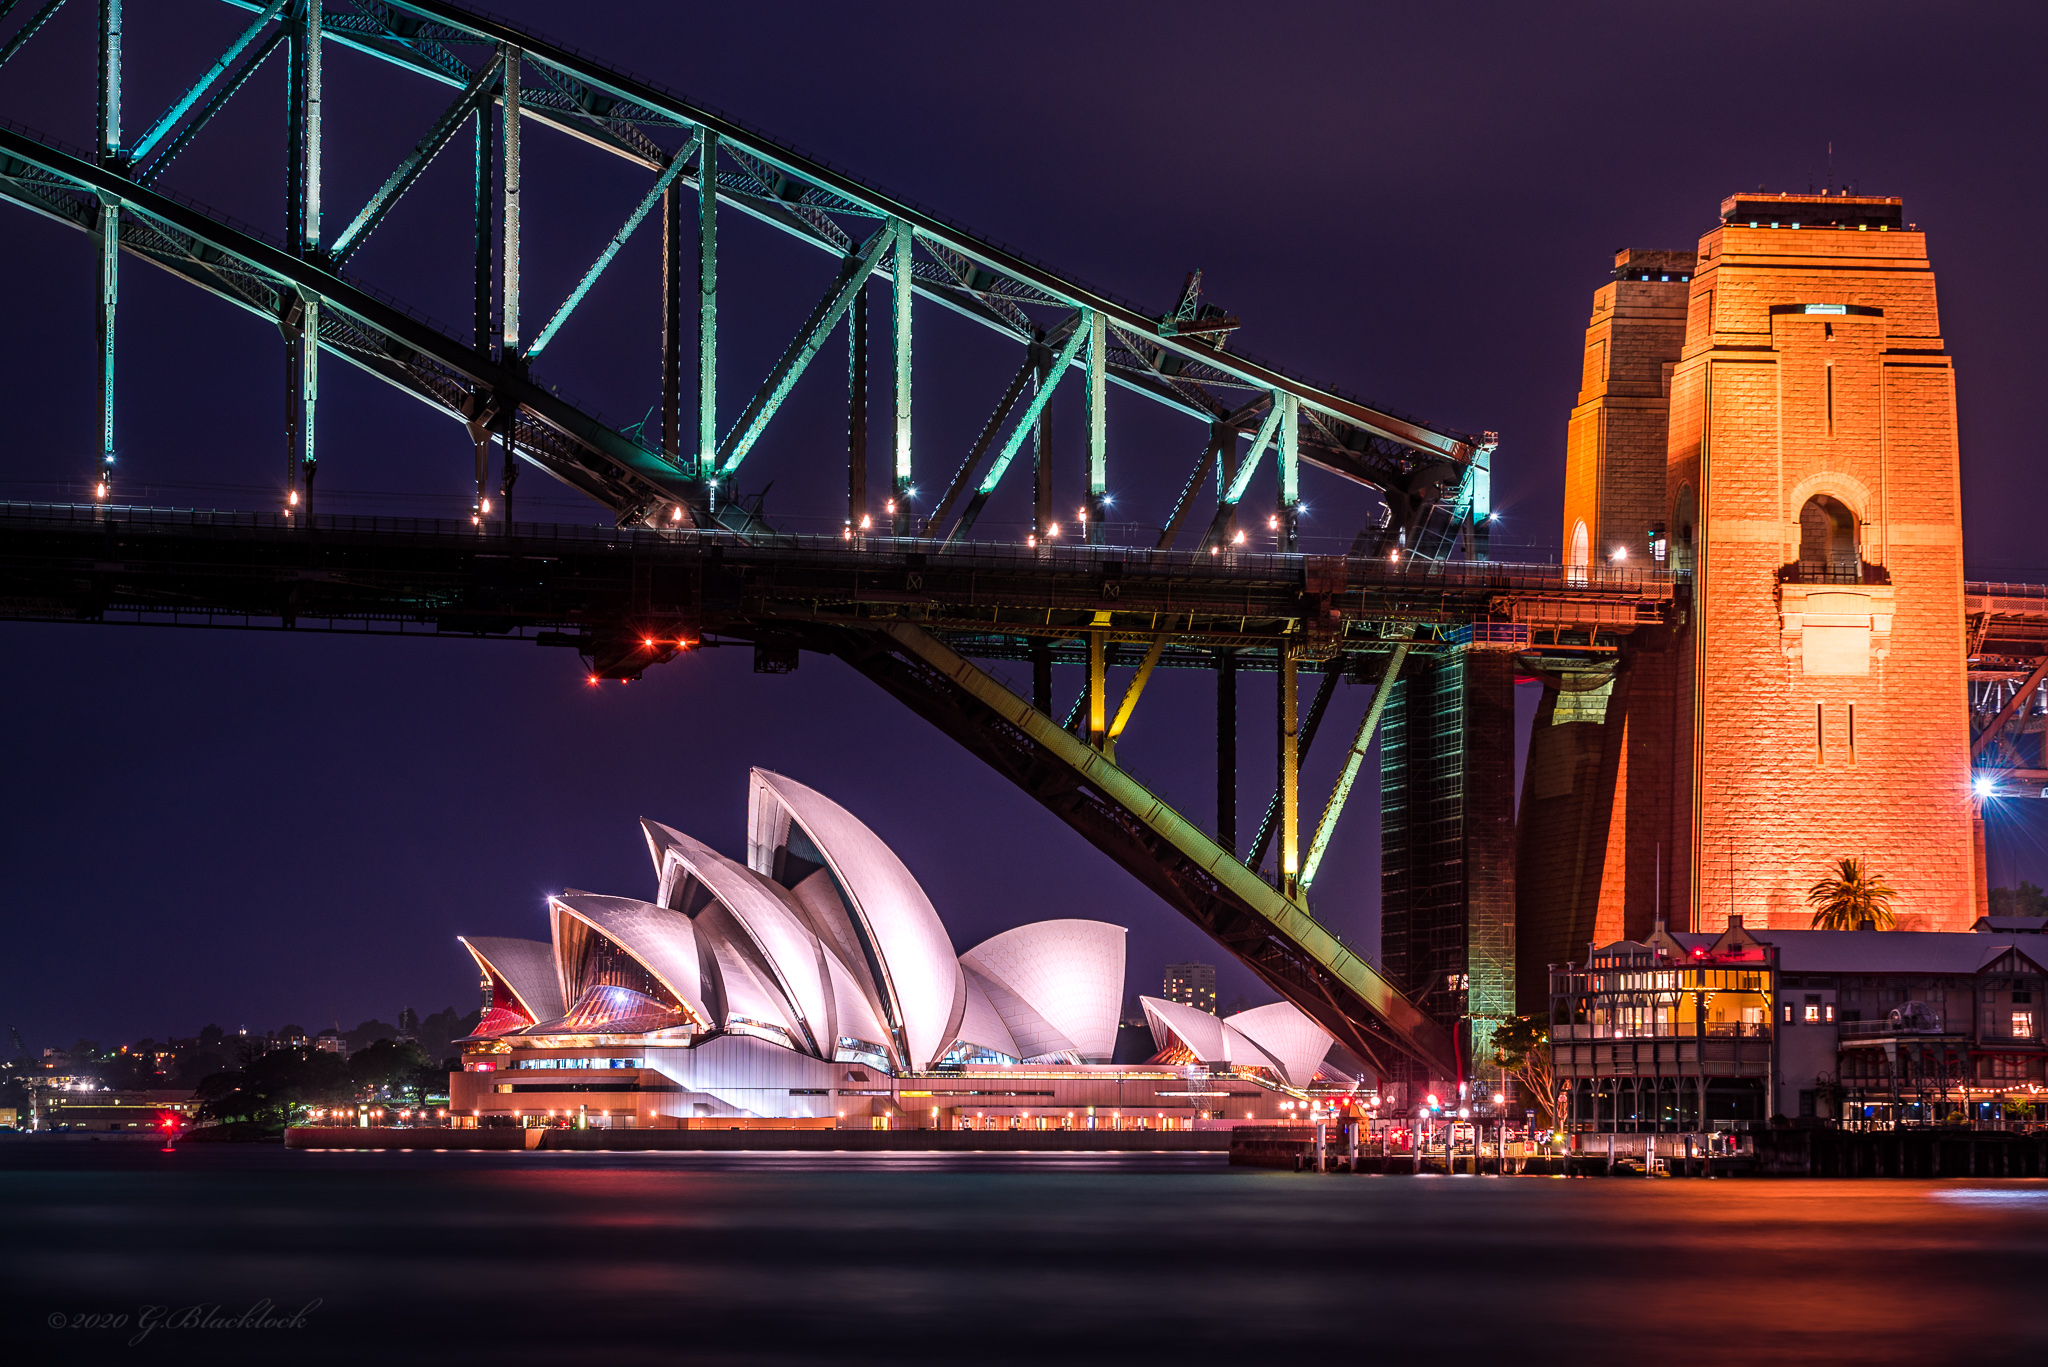
The Sydney Opera House is probably the most premium location and canvas for the Vivid festival, its seen by millions (thats just my guess without any real data 🙂 – but considering how many see it just in their daily commute i reckon its gotta be in that realm) so you wanna get it right.

I was not overly enthused by the display this year, very animated and not many wow moments. I did however do a bit of research on these mad projectors (Barco) which project the images / animations onto the sails, pretty cool things, the lens must be something pretty special and the bulbs that sit behind them… wowsers, however I did note that the bulbs have a life of 500 hours which i pretty good i reckon, you could do quite a few vivid sessions on a set of bulbs 😉 although you do have quite a few projectors for just one location :-O

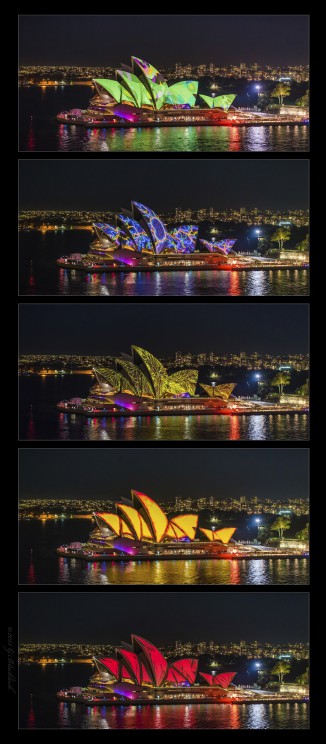
The following images are a selection of some of the better projections imo 🙂 I did love the big bold colours as opposed to the funny animations 😉 Be sure to zoom in, its large res just for that 🙂

Exif love:
D750 coupled with Nikkor 24-70 f2.8 @ 62mm Aperture: f/3.2 and Shutter Speed: 1/4s
ISO 1000
out front – colourful opera house.

https://blog.avernus.com.au/sydney-opera-house/